 I‘d like to preface this project with a couple notes: If you’re looking to make a high quality knife, don’t use a table saw blade; they’re a little too thin, and more of a utility steel than a high quality stainless. But, if you’re interested in trying knife making for the first time, or are just bored over the weekend (as was my case), an old table saw blade makes a fairly decent knife. And it’s kinda cool to repurpose something that was worn out, into something that will be useful for years to come.
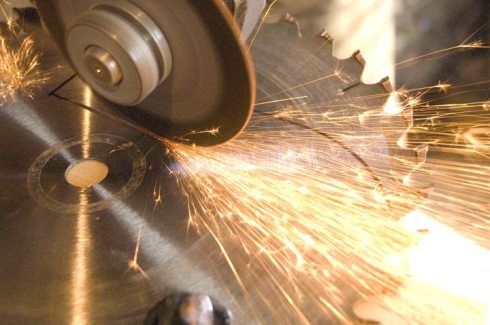
Step 1: Pencil out your knife design on the saw blade (as shown above) and then go over it with a dark marker. Once you’re happy with the design, clamp the blade down to a solid work surface, throw on the eye protection and get ready for some sparks to fly.
Step 2: Cut along your marker line, just leaving the line (we’ll take care of that later). You’ll need something like a cut-off wheel to cut your blade out. The metal used in table saw blades is too hard for a hacksaw to get through.
Step 3: So once we have our blade roughed out we’ll need to smooth out some of the rough cuts with a file. We’ll do our final shaping with a sanding drum and sanding station; but we want to remove as much material with a file as we can to save on sanding belts.
 Step 4: Next we’ll go to the sanding station to get our final shape. Turn your knife at right angles to the sanding station and gently sand away the metal until you get down to your marker line. Also, this is a good time to smooth out the swirl marks and any lettering still left on the saw blade from the factory (as seen here). But, if you like that look, you could always skip this step.
I’m using a 180 grit belt that’s fairly worn.
As it is, I’m not going to go too far into polishing this blade up. I think for this one, I want a rougher look.
Be sure to have some work gloves on for this step – that blade is gonna get hot fast.
 Step 5: The next step can be kinda tricky, and it’s definitely the part of knife making that takes the most practice. Getting a good bevel on both sides of knife is key to having a sharp blade – not to mention a good looking knife.
You can see here that I hold the blade at a pretty shallow angle to get a long beveled edge. As you sand, slowly roll the blade around to the point, trying to keep it at the same angle to the belt the whole time. Don’t stick around out there at the point too long or you’ll heat the metal up too hot and burn the tip, possibly loosing your point all together.
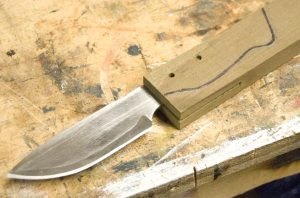
Step 6: Now, with some time and patience, you’ve fashioned a blade that looks roughly like this. Next, we’re gonna work on the grip. Compared to working metal, this part is easy. But the grip is where a lot of the style and appeal of a knife comes from – so take your time and sketch out a few designs first.
 I’m using a piece of 3/4″ thick wood. For this style of knife, the metal “tang” of the blade only goes to about half the length of the grip. So we’re going to cut a slot down the middle of the grip just slightly narrower than the thickness of the blade – you want the fit to be tight, but not so tight you split the wood.
Step 7: Mark and drill two holes for some pins. I like to drill through the wood and the blade at the same time, so everything will line up later.
A note on drilling holes through hard steel: Heat is the enemy of all drill bits. Go slow and use machine oil if necessary. If using oil, take the blade out of the grip once you’ve marked
it by the drill bit.
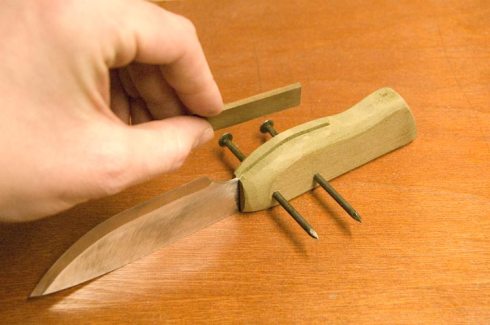
Step 8: Once you have your handle cut and roughly sanded into shape, you’ll need to cut a thin piece of wood to fill the gap left by the slot you cut for the blade. This picture above also illustrates how the pins (in this case a couple good sized nails) fit through the grip and blade. Cut the nails down to be just a bit wider than the grip. Then, glue everything together with a good two part epoxy. Once the glue is cured, do some final sanding (nails and all) and finish the wood as you like. In my case, I used hi gloss tung oil.
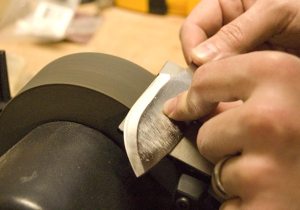
Step 9: This is one of my favorite parts – putting the edge on the blade. I’m using a sharpening wheel here, but a sharpening stone works just as well, and some people even prefer it. Try real hard on this step to get the knife’s edge to run as perfectly centered and straight down the blade as possible.
And you’re done! Hopefully it turned out well. If not, keep at it. Knife making is art, not science. There’s nothing like making your own knife; one of the oldest most useful tools man has ever created. I hope this tutorial helped.


